
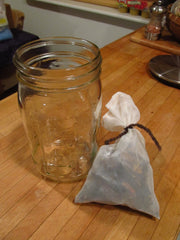
 In preparation, I sewed up several little bags made of sheer curtain material that I purchased from a little senior center craft/thrift shop in Sebastopol, CA. The fabric is some sort of synthetic and does not absorb the dye but is porous enough to allow the color to easily transfer between fungus and wool while keeping the wool free from debris.
I used 7 quart jars in a double boiler so that I could work with just one burner. My wool samples were weighed at 10 grams, then scoured in hot tap water with a drop of Bio-clean laundry soap. They were rinsed twice before being submerged into the 180° dye bath for varying lengths of time. If required, wool samples were mordanted in the jar while being dyed using 20% alum or 10% iron.
I started with 2 grams ofHapilopilus nidulans that I had had mixed results with in the past. I added the alum and a few splashes of ammonia which changed the pale water to an opaque shade of purple best compared to Easter candy. Ammonia was added periodically to keep the pH at a happy 9. This was a ratio test and I was pretty happy with the results of 1:5, of course I am sure more is better, but this little fungus is not easy to find.
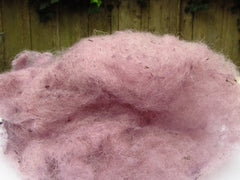
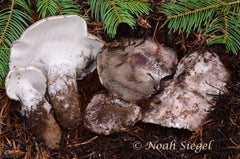
 Omphalotus olivascensis a mystery to me. It is capable of giving the most beautiful purples but it seems to happen at the whim of the dye bath. The color of the bath is brown and one must look at the wool itself to see the purple. When the color looks just right, the wool is removed from the pot. More often than not the delicate color stays for the rinsing, but as oxidization occurs, the beautiful purples slip away leaving a dismal sordid grey.
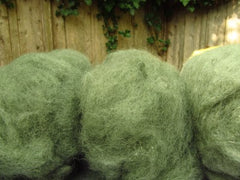
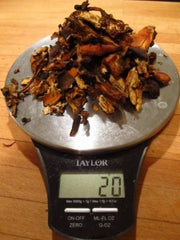 For this particular test, I wanted to know if the old rotten stuff mixed in my collection was ok for dye. I selected the most blackened crusty bits from the bag and measured out a 2:1 ratio. The best results often happen with no mordant or pH modification, so this is the route I tried. It took about 30 minutes for the wool to begin to change from the color of a strong black tea to the anticipated smoky-lilac, at which point I turned the heat down and kept it in the pot for about 10 more minutes.
Once removed and rinsed, it was a very pretty color, but as it dried it became a dirty, dingy beige (with purple highlights). Disappointed but determined, I could see that there was still a lot of dye in the bath. Hopeful, I added more wool but after 20 min it was merely grey. In a salvaging act of I briefly removed the second batch of wool, added 10% iron p, bumped the pH up with ammonia and put the wool back in. After another 30 min the wool transformed to a lovely cigar brown. This mushroom has so much potential, there must be a formula, but alas it evades me.
 One of the few mushrooms that gives its best dye without mordants is Boletopsis grisea. It is a strange white and dark grey fungus that has pores instead of gills. It has super dense white flesh that occasionally stains pinkish when cut. But what you’d never guess, is that hidden in its pale flesh is potent blue-green dye.
Despite a slight resemblance to boletes, this mushroom is actually related to other tooth fungi (in Thelephoaceae). So like I do with all the toothy dyes, I brought the pH up to 9 with a splash of ammonia. I used 20 grams of fungus and dyed over 30 grams of wool. This mushroom has won me over and resides in my favorite top 10.
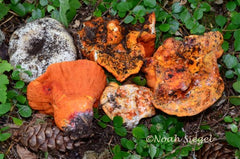
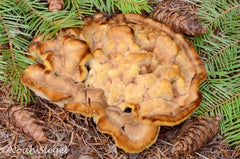 Phaeolus schweinitzii gives the best olive greens with iron. I dye my hats, coats, gloves and sweaters this color. However, today I let its alum yellows shine.
Best collected in its prime, these specimens looked great when I picked them back in November. But after drying, the yellow margin of the fungus turned brown and I was starting to doubt their primeness. I used a 1:1 ratio, wanting a potent color and the yellow. There was enough dye left over for a second bath which I added a pinch of iron to for a lime green.
 When dyeing with Hypomyces lactiflourum, I find that a slight elevation in pH using a splash of ammonia really helps this mushroom to release its dye. By the time the extraction is done (about an hour) the pH is back to 7 and the dye is simply a dark orange-red.

Ammonia being volatile, evaporates and off-gasses with heat; and with that the pH neutralizes fairly quickly. This can be advantageous it you want the solvent properties of ammonia, but don’t really care for major color changes. Hypomycesdye is particularly sensitive to pH; but in order to bring about lasting color change I use pH modifiers that do not neutralize as quickly. I dip the dyed goods into either a citric acid solution (pH4) or a washing soda bath (pH 9).
 Pisolithus tinctorius is a fungus that grows in dry places with oak, both of which Western Washington lacks. Although common in many parts of the US, Pisolithusis a dye source that is mysterious to me. I have never found it myself but have used it on occasion with mixed results. The first time I used it I got a dark cocoa brown, and since have only seen shades of pink and occasionally bright gold.
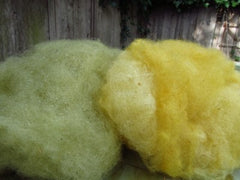
A little bit of this fungus will turn your dye bath a solid dark brown, so it looks like a strong dyer, even so I used 1:4 and all I got was a light pinkish beige. Not accepting defeat I started a second dye bath, this time using 4:1. The color was a rich, dark sienna. Mystery solved? Not sure.
 My only major disappointment was with Sarcodon fuscoindicus, a striking dark violet toothed mushroom that I had heard is a great dyer. I used a 2:1 ratio, kept the pH at 9, babied it and watched it to no avail. I just got pale beige. I will eventually try again, but would love to hear first hand reports for encouragement.
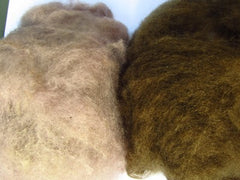
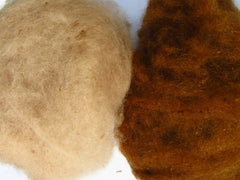
All in all, my experiments with ratios and batts were successful. There was minimal felting and the colors came out concentrated. Now I can ponder the design for my next felting project in color.
